SDK Setup (Mac OS)
This page is all about getting your Mac compiling code for the nRF9160 Feather. Run into trouble during the process? Post your questions on the community forum.
Installing IDE
- Install or use the code editor of your choice. I personally use Microsoft Visual Studio Code. The download link is here
- If you decide to use Visual Studio Code, make sure you install the C/C++ and Cortex-Debug extentions using the built in extension marketplace.
Installing SDK
-
Install Python3. The easiest way is with Homebrew. Install
brewfirst, then open a terminal and run:brew install python3 git cmake ninja wget -
Once complete, check to make sure that
python3is installed. Here's the example output. (Your version may be different.)> python3 --version Python 3.8.6💡Note: if you've freshly installed Homebrew or get an error that
python3is not found, you may have to add/usr/local/binto yourPATH. For example here's an entry for.bash_profileor.zshrc:export PATH=/usr/local/bin/:$PATHFor a shell like
fishyou'll need:set -U fish_user_paths /usr/local/bin/ $fish_user_paths -
Also check that
gitis installed with:❯ git --version git version 2.27.0 -
Install
west. West is the most important utility for using nRF Connect SDK & Zephyr. You'll become quite familliar with very soon.pip3 install west💡Note: you can update
westby issuingpip3 install -U westIt will uninstall the version on your machine and replace it with the latest. (It won't do anything if you have the latest installed.) -
Now create a folder on your machine and call it
nfed(short for nRF9160 Feather Examples and Drivers). Open a terminal to this folder and initialize nRF Connect SDK usingwest:cd ~ mkdir nfed cd nfed west init -m https://github.com/circuitdojo/nrf9160-feather-examples-and-drivers --mr main -
Once your nRF Connect SDK compontents are downloaded, you'll need to fetch the remaining SDK:
west updateYou'll see a bunch of output go by as
westdownloads dependencies using Git.Here's what your
nfedfolder should look like:❯ tree -L 1 . ├── bootloader ├── build ├── latest ├── mbedtls ├── modules ├── nrf ├── nrf9160-feather ├── nrfxlib ├── test ├── tools └── zephyr -
Install the remaining
python3requirements by running these commands in yournfeddirectory.pip3 install -r zephyr/scripts/requirements.txt
The ARM Embedded Toolchain
-
Install the toolchain by pulling it from ARM. Run these commands:
cd ~
wget "https://developer.arm.com/-/media/Files/downloads/gnu-rm/9-2019q4/gcc-arm-none-eabi-9-2019-q4-major-mac.tar.bz2"
tar xvfj gcc-arm-none-eabi-9-2019-q4-major-mac.tar.bz2
rm gcc-arm-none-eabi-9-2019-q4-major-mac.tar.bz2
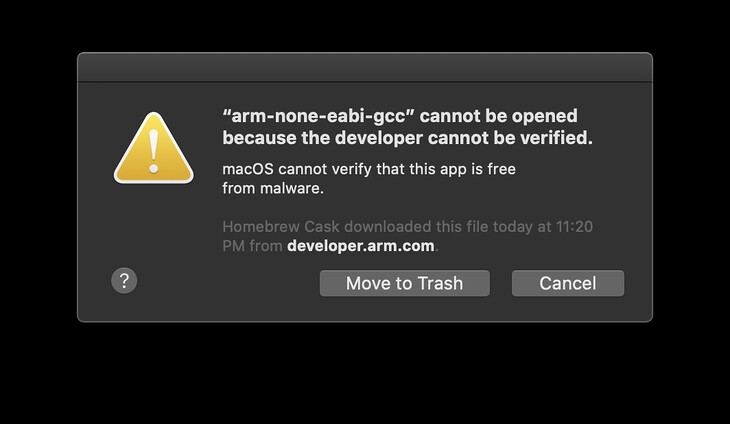
Note for Catalina users you will get an error when running these utilities for the first time. You must allow them to be executed in your Security preferences.

-
Finally you'll need export a few important environment variables for things to work. For
bashhere's the entry for.bash_profilethat I have:# Zephyr related export ZEPHYR_TOOLCHAIN_VARIANT=gnuarmemb export GNUARMEMB_TOOLCHAIN_PATH="~/gcc-arm-none-eabi-9-2019-q4-major"💡Note: this should also work for
.zshrcfor those folks who are using newer versions of Mac OS (or just plain preferzsh)For folks using
fishyou're going to use:set -Ux ZEPHYR_TOOLCHAIN_VARIANT gnuarmemb set -Ux GNUARMEMB_TOOLCHAIN_PATH "~/gcc-arm-none-eabi-9-2019-q4-major"
newtmgr (Used to load your application via USB serial bootloader)
-
For loading code to your nRF9160 Feather, you'll need to download and copy a custom version of
newtmgrto a folder in yourPATH.cd ~/Downloads wget "https://docs.circuitdojo.com/files/newtmgr/darwin/newtmgr.zip" unzip newtmgr.zip sudo mv newtmgr /usr/local/bin rm newtmgr.zipIf you're not sure,
/usr/local/bin/is always a good spot for these types of binaries. -
Then you'll need to add your serial profile to make it easier to download/update your device:
newtmgr conn add serial type=serial connstring='dev=/dev/tty.SLAB_USBtoUART,baud=1000000'If you have multiple Silicon Labs CP2102 connected to your machine your serial port may be named differently. I recommend you unplug all devices that could be named
tty.SLAB_USBtoUARTto ensure you're targeting the correct device during programming. -
Having trouble? You may have to install the drivers.
For more info in using newtmgr checkout the programming section of this documentation.
Testing it
You can quickly test if your SDK is set up correctly by checking out the samples.