
Using nRF Connect for VSCode
Setup
-
Install nRF Connect for VSCode
-
Once the extension pack is installed. Install the 3.0.1 Toolchain
You can use the
nRF Connect : Manage Toolchainscommand to do this. If you’ve never used the extension before, it will prompt you to install the toolchain.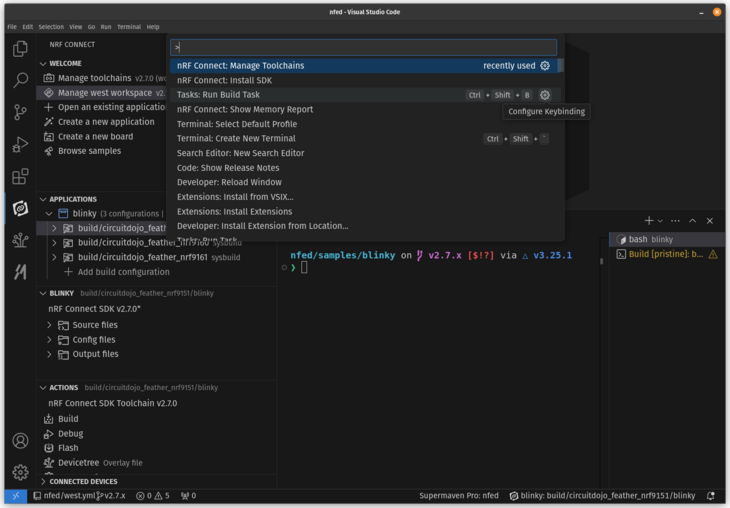
-
Then let’s run the
nRF Connect: West Initcommand. You can invoke the task launcher by pressingCtrl+Shift+Pand start typingnRF Connect: West Init.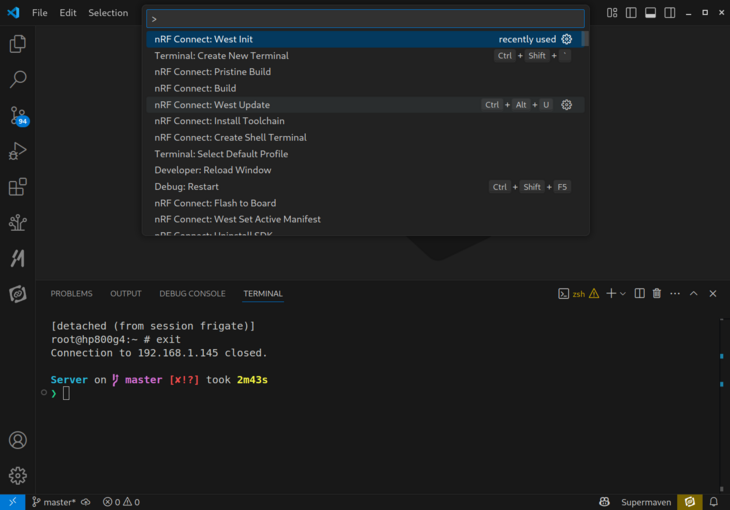
-
Follow the prompts to set a location for the west manifest file.Then when prompted for a project type, use the
Custom repositoryoption.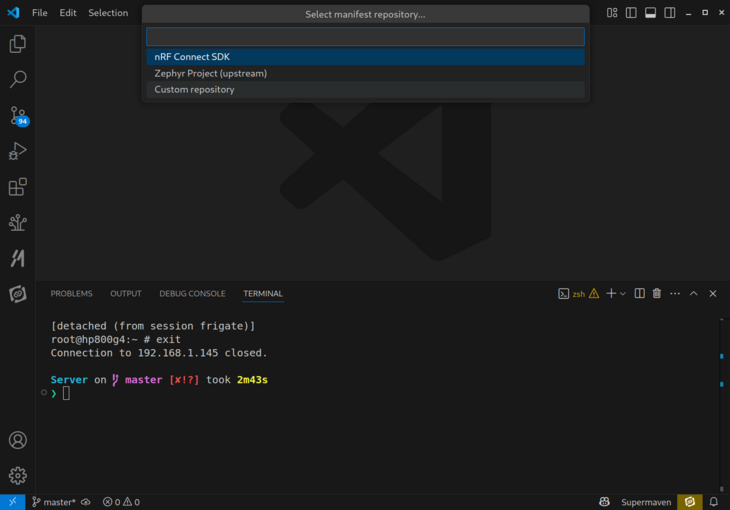
When prompted for the URL, enter
https://github.com/circuitdojo/nrf9160-feather-examples-and-drivers.git. And usev3.0.xas the version.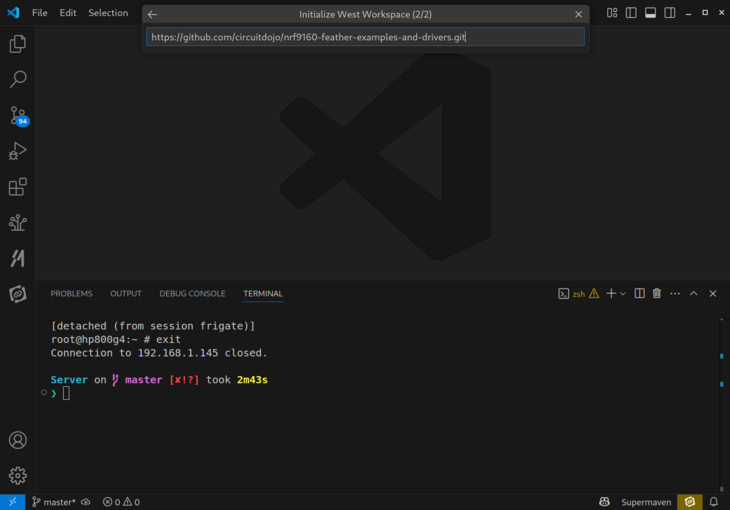
When ready, you will see output at the bottom like:
[09:33:23] ENOENT: no such file or directory, open 'c:\ncs\v1.5.1\.west\config' (c:\ncs\v1.5.1)
[09:33:32] nrfutil-sdk-manager toolchain,install,--ncs-version,v3.0.1: Download toolchain v3.0.1
[09:35:17] nrfutil-sdk-manager toolchain,install,--ncs-version,v3.0.1: Toolchain downloaded: success
[09:35:17] nrfutil-sdk-manager toolchain,install,--ncs-version,v3.0.1: Unpack toolchain v3.0.1
[09:36:03] nrfutil-sdk-manager toolchain,install,--ncs-version,v3.0.1: Toolchain unpacked to C:\ncs\tmp\.tmp6AunCY: success
[09:36:03] nrfutil-sdk-manager toolchain,install,--ncs-version,v3.0.1: Install toolchain v3.0.1
[09:36:03] nrfutil-sdk-manager toolchain,install,--ncs-version,v3.0.1: Toolchain installed at C:\ncs\toolchains\0b393f9e1b: success
[west]: === Initializing in c:\nfed
[west]: --- Cloning manifest repository from https://github.com/circuitdojo/nrf9160-feather-examples-and-drivers.git
[west]: Cloning into 'c:\nfed\.west\manifest-tmp'...
[west]: --- setting manifest.path to nfed
[west]: === Initialized. Now run "west update" inside c:\nfed.
Note: you may have to open the folder you created during the
west initbefore running thewest updatecommand. (next step) -
Once intialized, we need to run the
nRF Connect: West Updatecommand.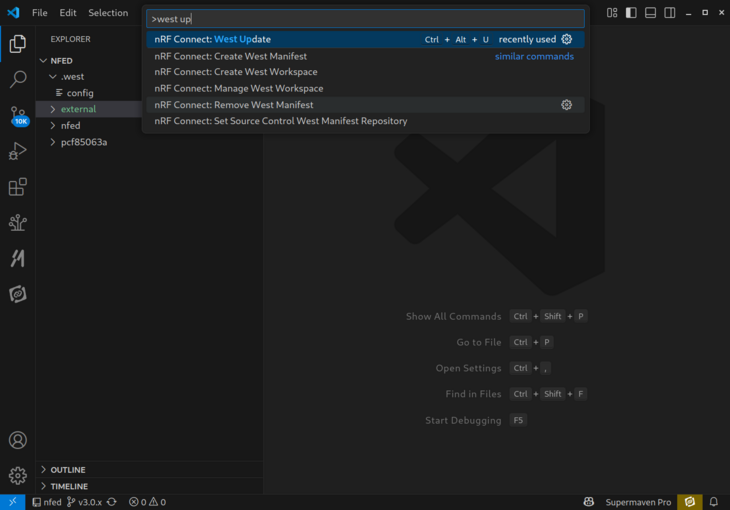
This process will download a full copy of Zephyr and NCS. It’s required for any project that uses a west manifest file. It will take a minute or two to download all the dependencies.
Building
-
Click the
Open Existing Applicationbutton and choose, for example, thenrf9160-feather-examples-and-drivers/samples/blinkyfolder.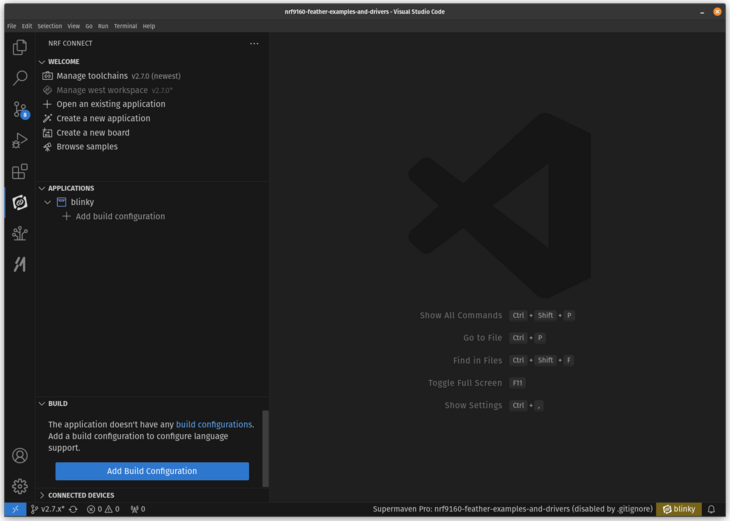
-
Then click the
Add Build Configurationbutton.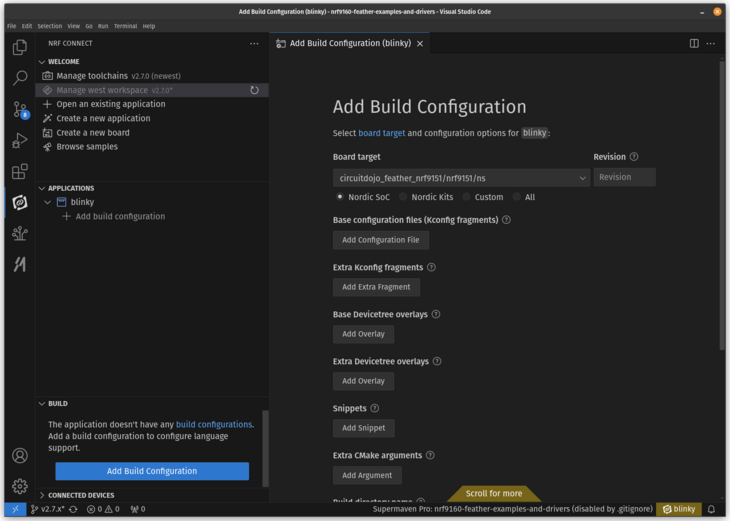
Make sure you choose
circuitdojo/nrf9151-feather/nsas the board.Additionally, edit the build directory if you’d like. We recommend
build/circuitdojo_feather_nrf9151.And finally, make sure that
Use sysbuildis checked.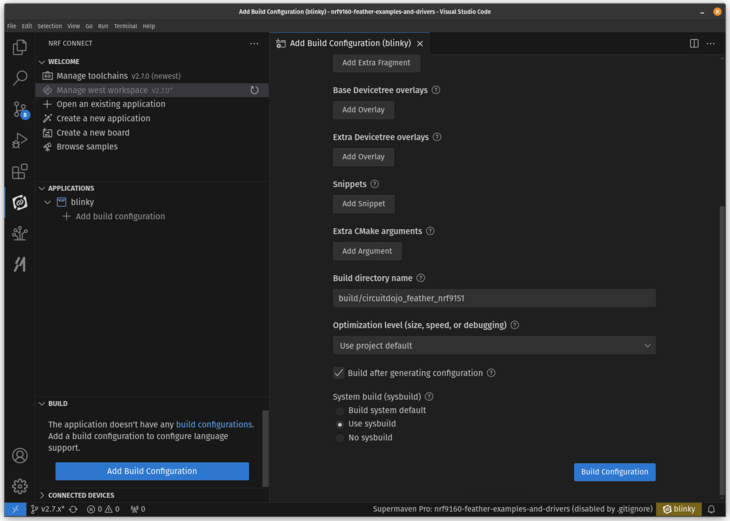
Then click
Build Configuration -
The app will build. You can view the build output in the tab to the right:
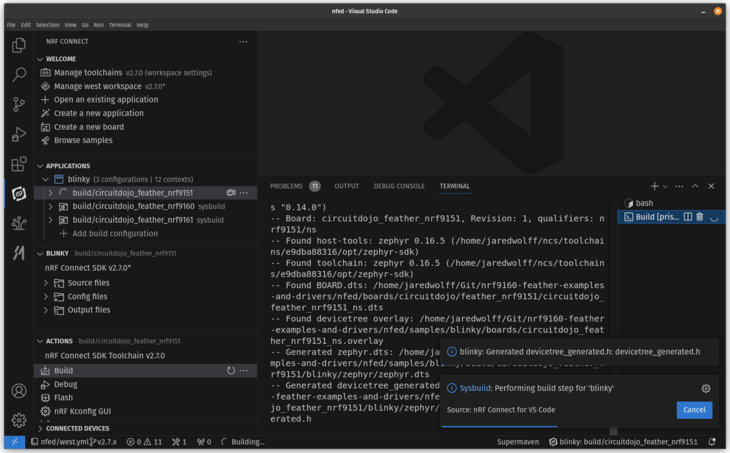
Once you get this output, you’re good to go!
[7/207] Generating include/generated/version.h -- Zephyr version: 3.6.99 (/home/jaredwolff/Git/nrf9160-feather-examples-and-driverszephyr), build: v3.6.99-ncs2 [207/207] Linking C executable zephyr/zephyr.elf Memory region Used Size Region Size %age Used FLASH: 46844 B 48 KB 95.30% RAM: 22720 B 32 KB 69.34% IDT_LIST: 0 GB 32 KB 0.00% Generating files from /home/jaredwolff/Git/nrf9160-feather-examples-and-drivers/nfed/samples/blinky/build/circuitdojo_feather_nrf9151/mcuboot/zephyr/zephyr.elf for board:circuitdojo_feather_nrf9151 [20/20] Generating ../merged.hex -
You can locate the
.hexfile in thebuildfolder. It’s also provided in the nRF Connect for VSCode window: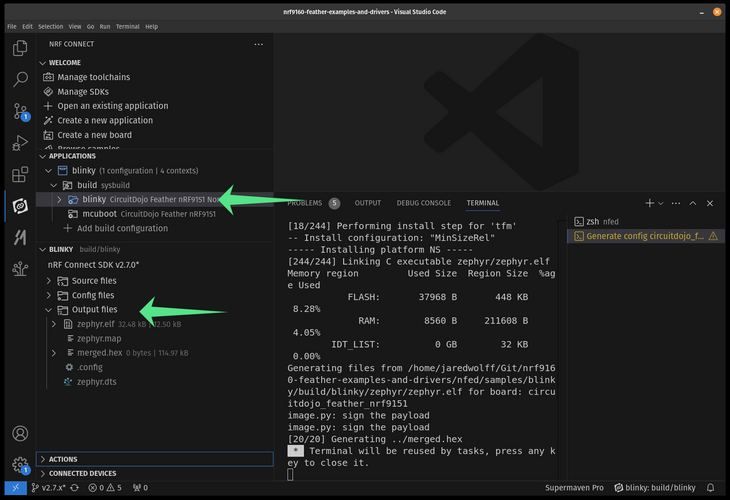
Flashing
Note: we’re working on ways to flash from the UI in VSCode. In the meantime, here’s how to do it manually.
The nRF9151 Feather has a build-in CMSIS-DAP debugger. You can use it to flash the firmware. The two utilities that you can use are:
probe-rs
probe-rs
First you’ll need the rust toolchain installed before you install probe-rs. Install rustup first by following the instructions here.
To install use:
curl --proto '=https' --tlsv1.2 -LsSf https://github.com/probe-rs/probe-rs/releases/latest/download/probe-rs-tools-installer.sh | sh
You will also need to set up udev rules on Linux. See here for more info.
Then you can program using:
cd samples/blinky
probe-rs download --chip nRF9151_xxAA --binary-format hex build/circuitdojo_feather_nrf9151/merged.hex
probe-rs reset --chip nRF9151_xxAA
Note: change location to the sample/application you’re working on. This is where your build folder is located.